|
|
Back to brake fluid Forward to starter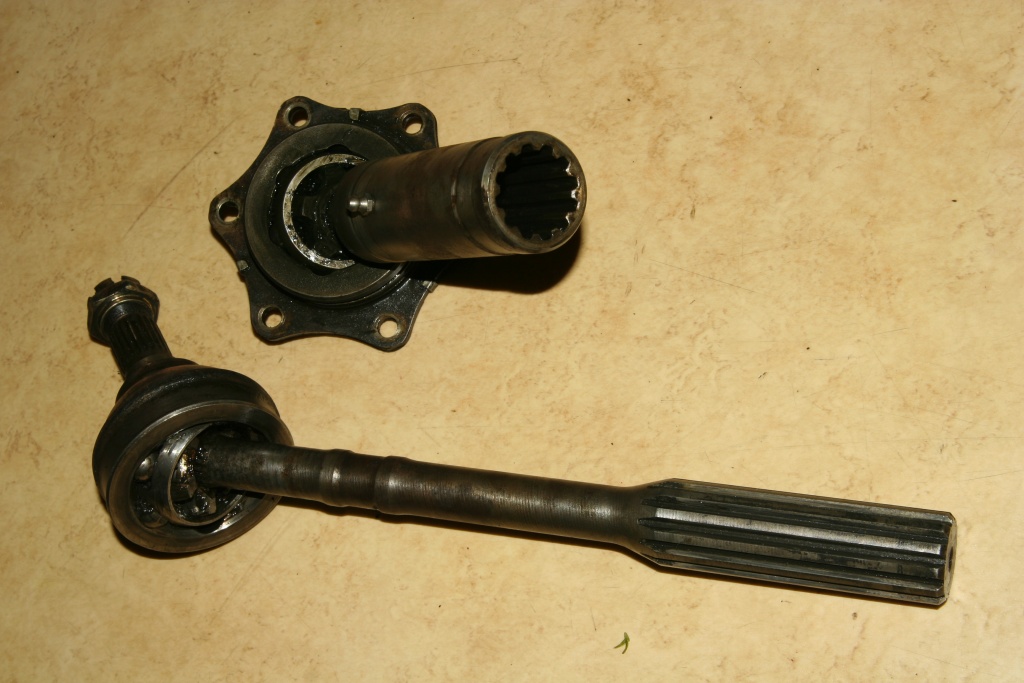 The 2CV has like many other cars with front wheel drive, a so-called 'homokinetic' drive shaft. Homokinetic means that even with large angles of the steering wheel the torque of the engine is passed homogeneously to the wheels. With conventional joints, as they can be found e.g. with cardan shafts at Trucks, the torque varies in dependence of the angle of rotation. Here however only small angles become balanced. The shifting joint balances the length of the drive shaft when bouncing the chassis. The lubrication fitting of the driveshaft must be unscrewed for the assembly of the sleeves. 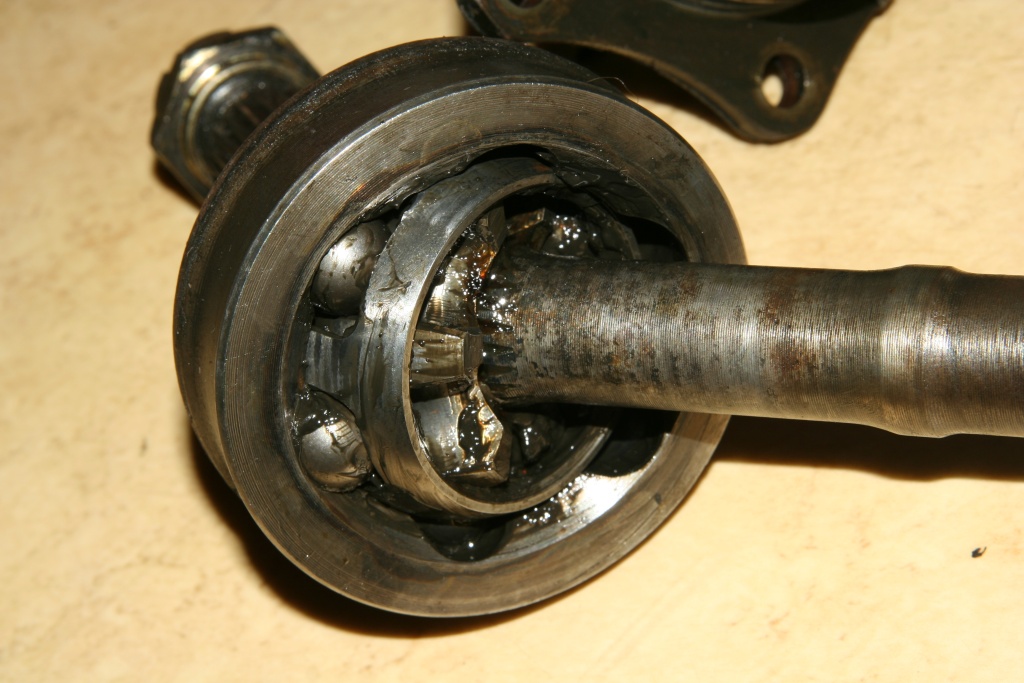 The spherical cup connected with the wheel has grooves for small balls. The drive shaft possesses a ball star, which also has such grooves. The balls are held by a cage and transfer the torque homokinetic (homo=equal, kinema=movement).  Three sleeves per drive shaft ensure for the fact that the parts remain always greased and no dirt lowers the life span. In this photo two clips, a cable strap (?) and a rubber band can be seen, which should fix the seals on the drive shaft. With my duck No. 1 I had used these, switched nevertheless later to the method with Ligarexband, described below. 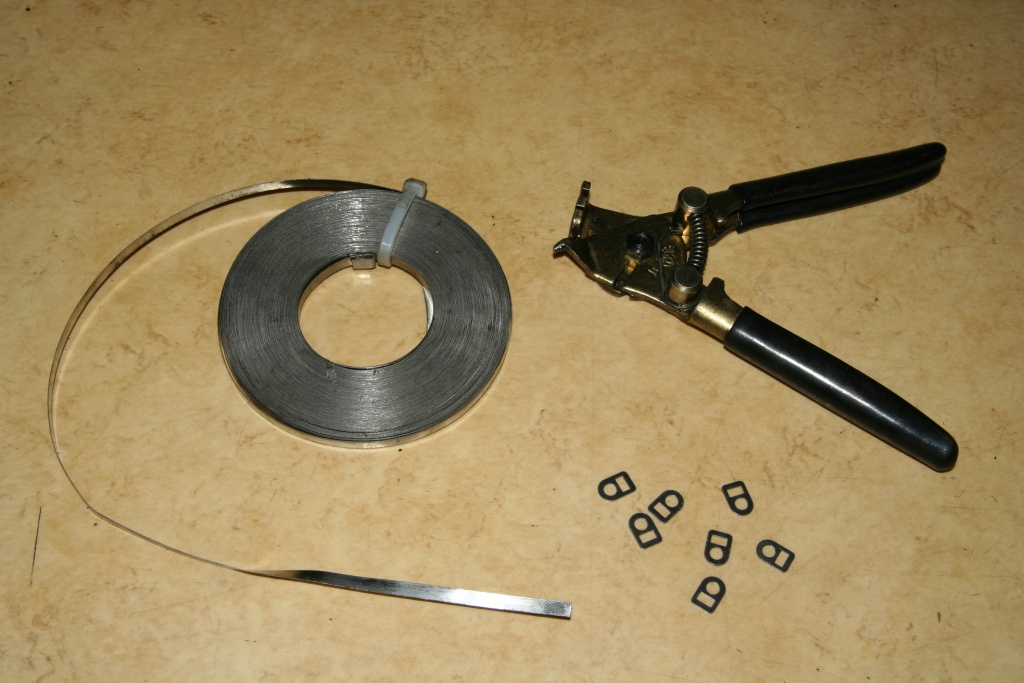 The adjustment of the sleeves was made ex factory with Ligarexband and everything else is just suitable as a temporary solution. Steel tape, appropriate locks and a special tool for stretching the tapes is needed. The only really noticeable factor is this pliers, whose acquisition is worthwhile in my eyes. 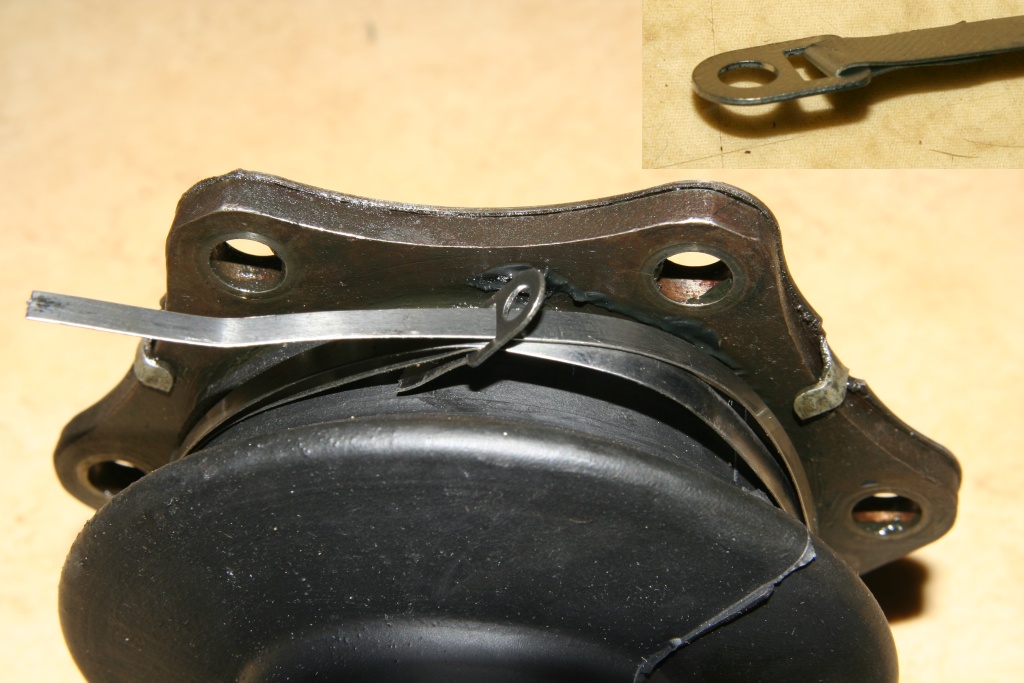 The tape is bent approx. 1,5cm by the lock. The tape is then cut off in such a way that it can be wound twice around the driveshaft as shown at the photo. The bent end points thereby to the driveshaft. 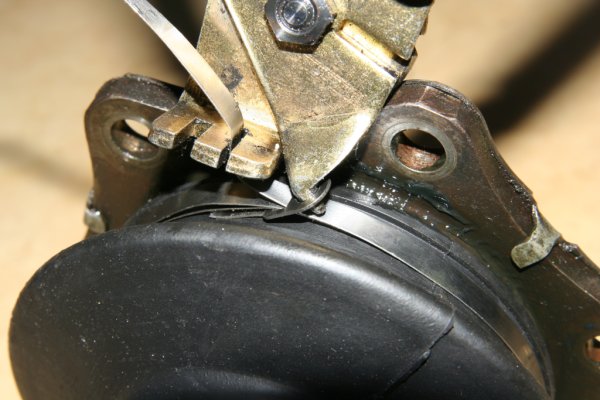 By squeezing the special pliers together the tape becomes now strained. 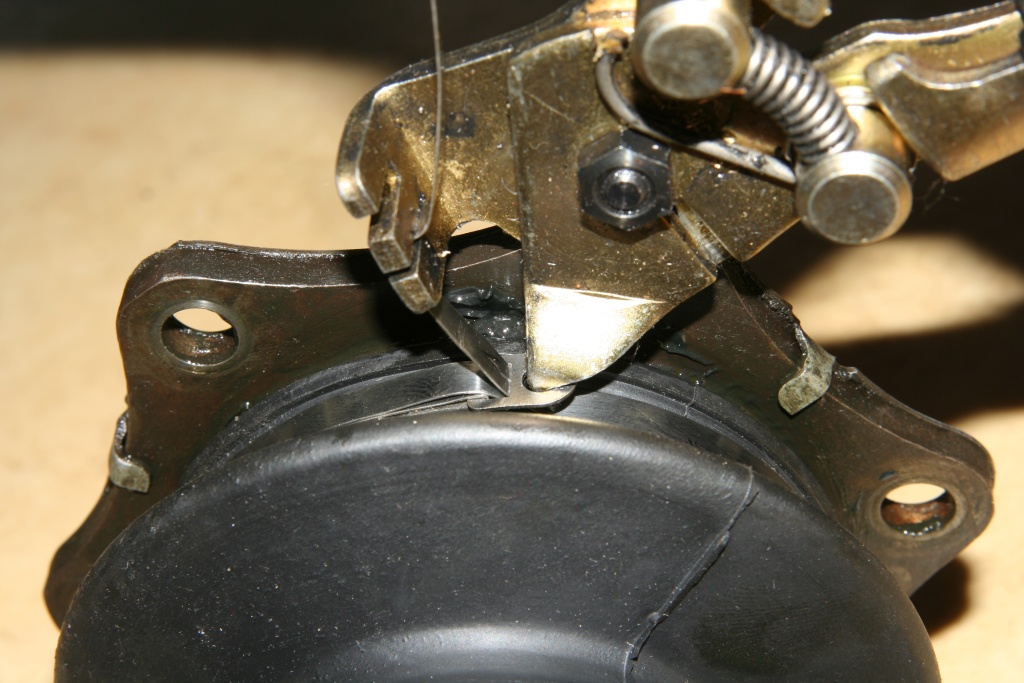 If the desired tension is reached, the pliers and thus the metal band are bent toward lock.  Press the tape with the thumb when taking the pliers out and bend it completely. 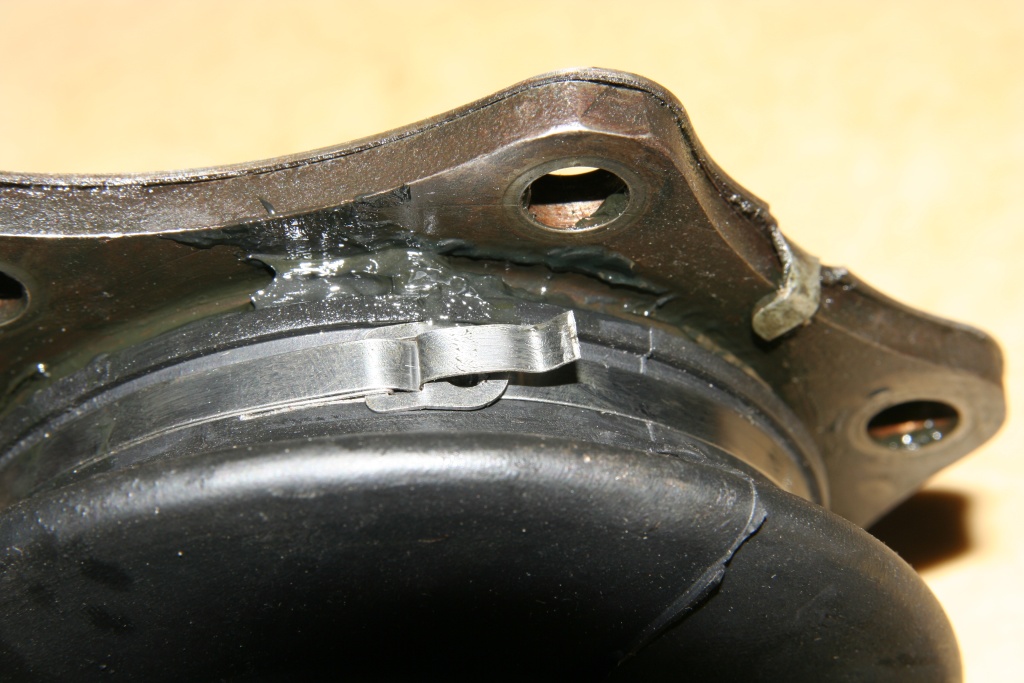 Cut off the tape approx. 5mm behind the lock.  Bend the tape around the lock... 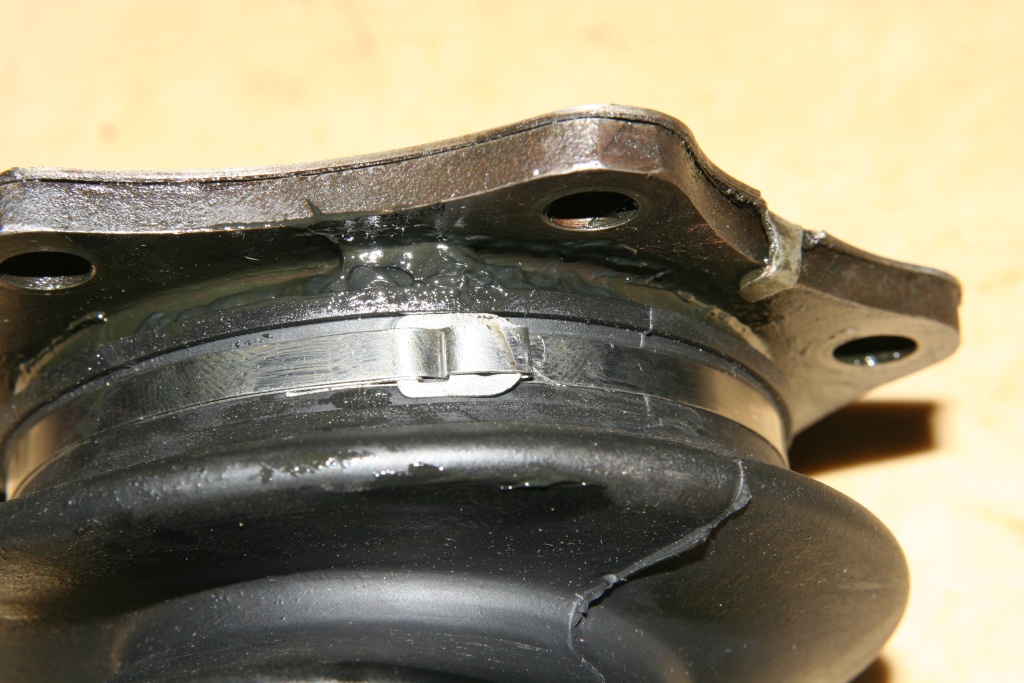 ...and back-bend the lock - finished. 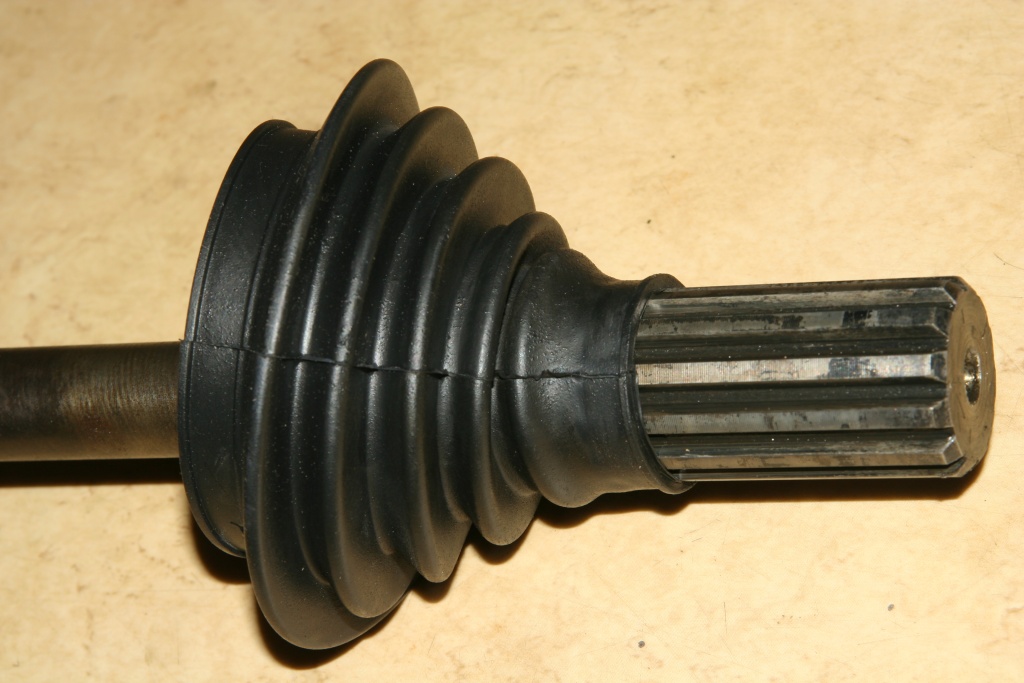 The wheel-sided sleeve is to be pulled on the thin end carefully over the driveshaft without damaging (don't use tools such as screwdrivers).  The sliding seal in the center of the drive shaft is only transmission-laterally fixed with Ligarexband. The other end remains free. 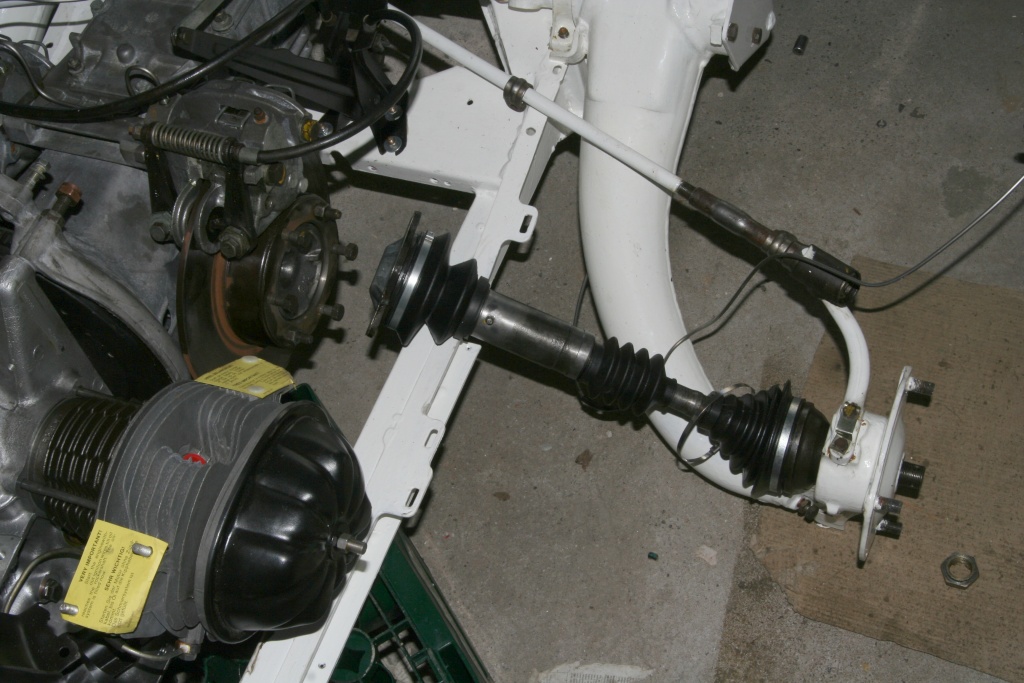 And there it belongs. Gearbox-sided with 4 screws and two screw bolts + nut as well as the brake disk fastened (torque 45Nm). 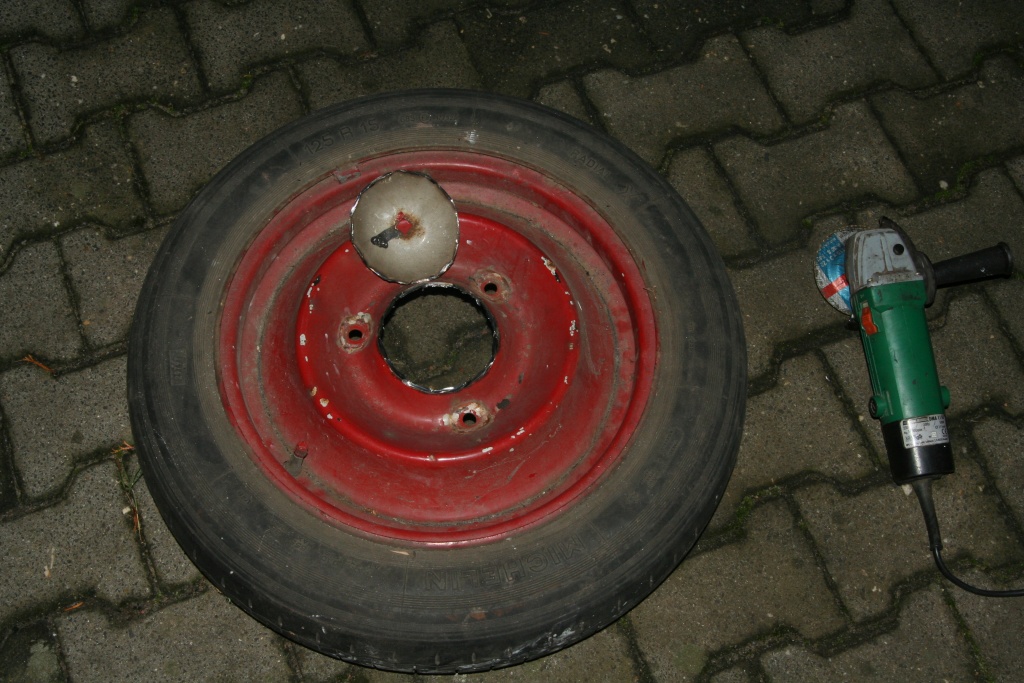 At the wheel the drive shaft is to be tightened with a torque of 350Nm. Since it is difficult to hold against this torque you can built a tool out of an old rim with an old tire. Cut the rim as seen at the photo. Round the edge with a rasp (not done at the photos). 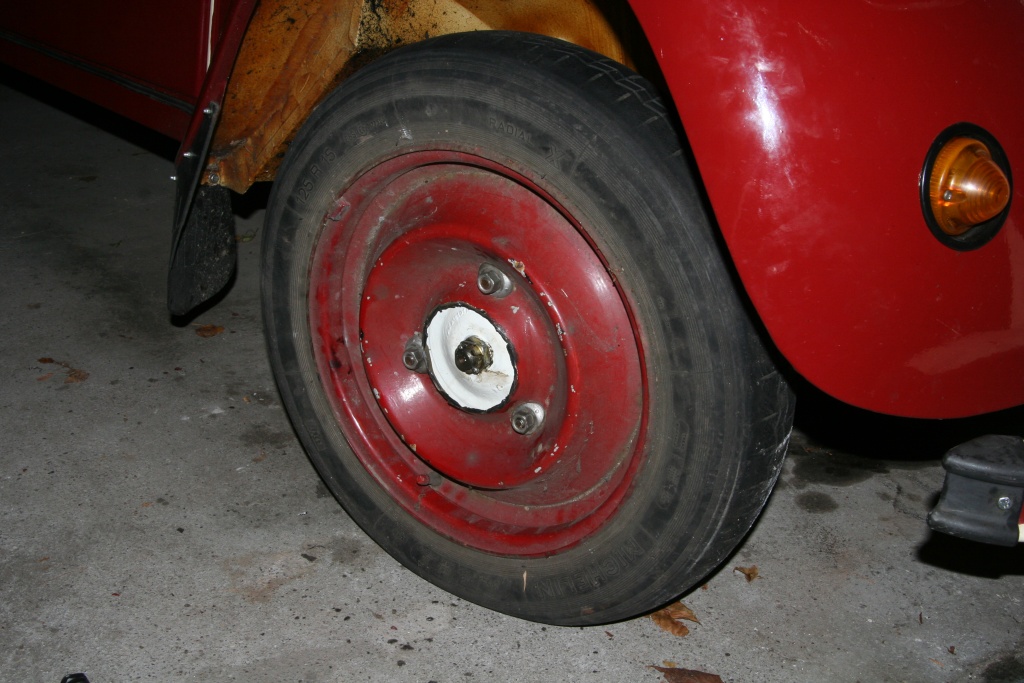 This rim is installed now in place of the tire and the jacking equipment is removed. The slotted nut can be tightened now with the appropriate torque or loosened by the hole in the rim in reverse also again. Lock the engine additionally with the help of the drilling in the flywheel or at least insert a gear and pull hand brake. 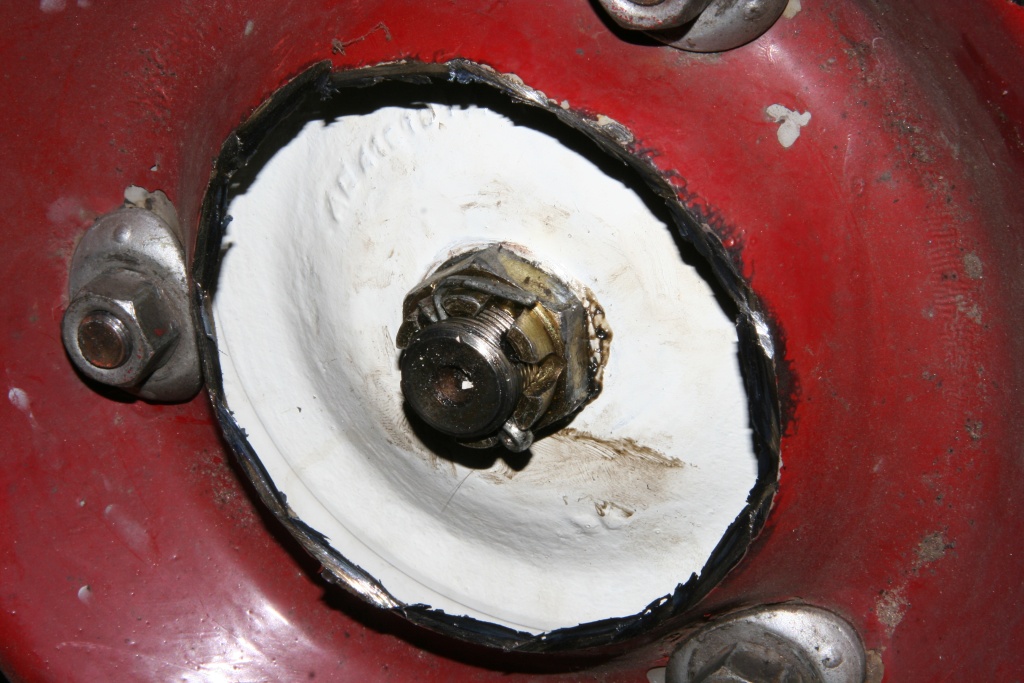 The slotted nut is to be provided afterwards with a cotter! 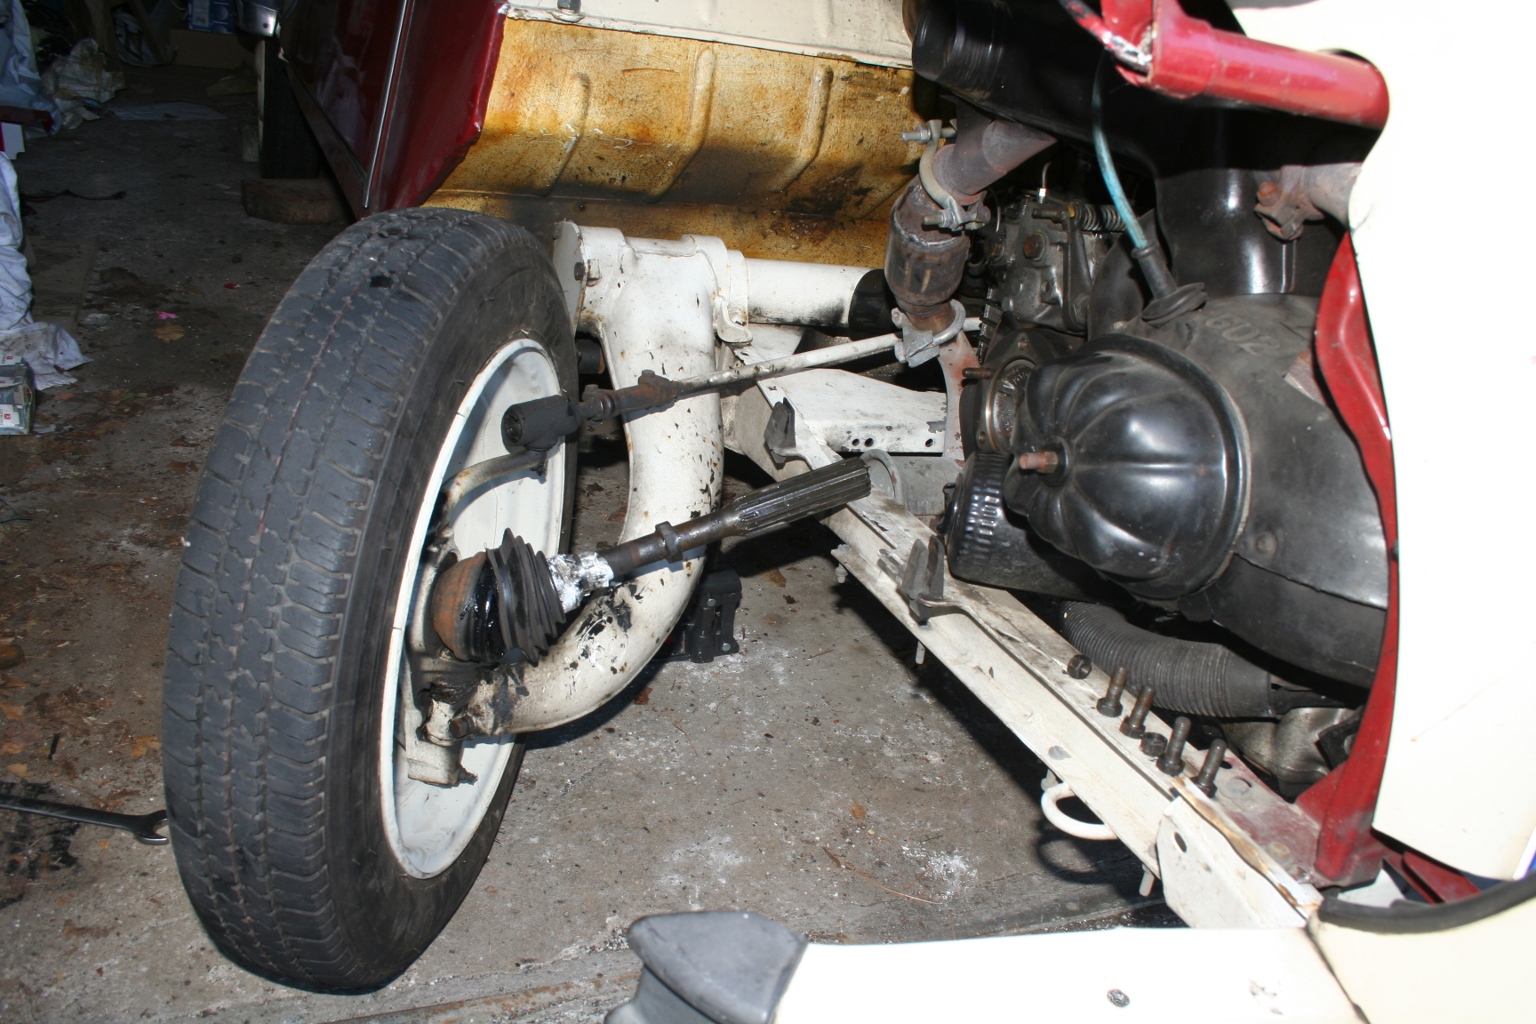 Buy good quality! I had to replace the car bellows after 20.000km already... For the replacement, you don't have to remove the whole drive shaft. It is enough to loosen the 6 bolts of the gear side. To pull out the half, you have to lift the accordant axis slightly. Back to brake fluid Forward to starter |